

After a few months of having smaller and bigger issues with the van (you can read about it here), we finally had one big issue. The van was running hot (again) after we had been driving some stupendous steep slopes in Costa Rica. It was not the first time. For all central America it is the same: the roads are in general much steeper than is common in Europe. But there aren’t any road signs to indicate the slope, (there is only a pictorial of a car on a slope – a bit useless: I can see that it is going up or down!)
Anyway, after a serious diagnosis garage, it became clr ear that something in the engine was leaking indeed. After taking the valve head off the engine, it was easy too see that the valve head itself had a crack.
Not really uncommon for this type of engine (the Mitsubishi 4D56 turbo diesel engine), but until now I had succeeded in avoiding this issue. Unfortunately, because of the leaking, the radiator was blown as well.


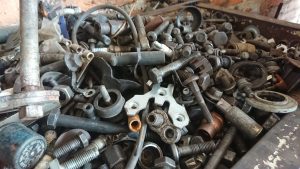
So, this meant a serious repair, taking some serious time, if only for all the parts that needed to be ordered and collected. It was estimated to be two weeks. Because the van would be in the garage so long and because it would have to be taken apart quite a bit, we decided to do some more work while we were at it. All in all it took two and a halve week to get us going again. So, besides the new valve head there is also:
- head gasket (of course)
- radiator
- thermostat
- timing belts
- crank shaft seals front and rear
- clutch plates and parts
- removed the EGR valve
- re-arranged the air intake (straight from snorkel)
- additional electrical fan to keep the engine cool
- new front brakes, disks and pads.
- air, fuel and oil filter
- engine oil
- coolant


Was that the end of it?
No. After assembling the engine and adjusting the timing of the fuel pump, the van was tested at the garage and found to be OK. But as soon as we were on our way to Limón, on the Caribbean side of Costa Rica, it seemed the engine power was reducing, feeling sluggish and making it almost impossible to drive over any significant crest. This was of course very worrying after such a mayor engine overhaul. Thinking about it I could only come up with the worst case: a blown head. But it seemed so unlikely, right after fitting a brand new valve head. I decided to toss this issue on the Mitsubishi L300 Offroad facebook page. Meanwhile we slowly made our way to Limón. Luckily the road was mostly going down.
And while Marcia was doing the grocery shopping in Limón, a quick inspection underneath the van revealed an oil leak at the rear prop shaft, where it connects to the transfer case. Another problem! Since it was Saturday afternoon, I quickly decided to find a new seal for the rear prop shaft, and some gear oil to refill the transfer case. Sadly the exact same seal (MD731708) was not available, but after inspection of the available new seal I concluded it would work as well. It had the same dimensions and an additional -not needed- lip. Luckily I succeed just before closing time.


So, on Sunday we were enjoying the sun on the Caribbean coast, but meanwhile I was also replacing the oil seal for the rear shaft. Of course it is not uncommon for a seal the start leaking after things have been taken apart and been put back. In this case the rear prop shaft had been removed at the garage to be able to remove the gearbox for the clutch plate replacement. All in all replacing the seal is not such a difficult job. Only four bolts to remove, take out the prop shaft, remove the old seal and tap the new seal -carefully- in place. And actually not so much oil was lost: I could only top it up with 0.5 litre. A tiny oil leak can look like serious leak because the oil droplets spread out easily, covering a huge area underneath the van.


Meanwhile the other problem (the reduction of engine power) was solved too: with the help of facebook (thanks guys!) it seemed most logical that it was either a fuel or air problem. So I started with the air: checking the air filter, the air intake, along the turbo… and there it was: the actuator for the waste gate had come loose, the retaining clip was gone. And with the waste gate open, the turbo cannot build up pressure to provide the right amount of air for combustion. So this one was solved easily.


Must have been a strange feeling to see your home covered in oily engine bits… But i guess after all those repairs, your fast house feels like new again when driving! 😊
It seems that you have truly earned your field-repair badge by now.
As always the story makes for enjoyable reading.
Hope you both ( and let’s not forget Binkie) have wonderfull and safe continuous travels.
Where can I get the badge? 😁. It is nice to hear that the read is enjoyable! Let’s see how far south we can get now.